Creating Supervisory Relationships
In order to utilize the Supervisee Review feature, you'll first need to enable supervision within your Practice Settings and set up the supervisory relationships within your Staff & Users settings.
- Navigate to the Practice Settings bucket within the General tab.
- Check the box next to "Uses Supervision" to enable the supervisory features.
- Navigate to the Staff & Users tab (on the left-hand side) within your Account Settings.

- Click on the "Supervision" header and then click +Add Supervisory Relationship.
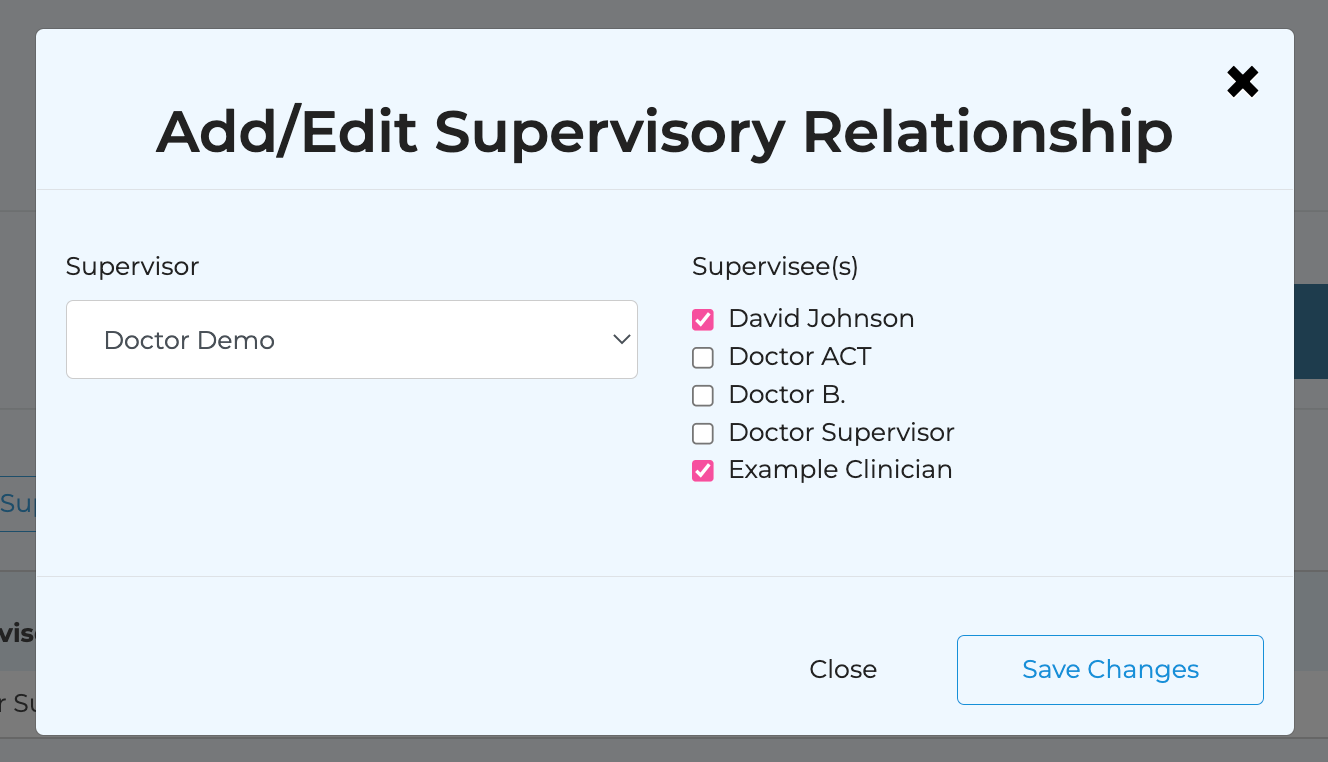
- Choose the supervisor from the dropdown on the left-hand side, and then check the boxes of the appropriate supervisee(s) on the right-hand side. Then, press Save Changes.

- To make changes to existing supervisor relationships (e.g., remove or add a new supervisee to an existing supervisor), you can click on the edit button on the right-hand side.
Related Articles
Supervisory Features
In order to utilize the supervisory features, you must first have the correct supervisory relationship configured in the Account Settings. For instructions on how an administrator can do so, please see here: Creating Supervisory Relationships ...
Creating Non-Client Appointments
Step 1: Navigate to Account Settings - Facilities and Rooms to create a facility called ‘Non-Client Appointments. Step 2: Add room(s) to the Non-client Facility. I.e., CLOSED, Personal, Holiday, Vacation. (You will still be able to add a title when ...
Creating Intake Packets
Step 1: Design the individual surveys that you'd like to include in your intake packet. Directions for creating custom surveys can be found here (Designing Custom Surveys) Step 2: Navigate to the Packets tab within Surveys & Packets, and click + Add ...
Creating Invoices/Superbills
Please note: "invoice" is synonymous with "superbill." STEP 1: Ensure your account settings are configured correctly. (FAQ: Configuring Invoice Settings) STEP 2: Ensure the necessary client details are correctly input into their client profile and ...
Creating a Cohort to Schedule Send Packets (Intakes & ROMs)
You can create cohorts within MBP to automatically send packets on a schedule of your choosing. This is great for sending intake packets at the time of creating a client -- OR -- to send out routine outcome measures or satisfaction surveys. Step 1: ...